5 Editing Moves That Help Clients See the Design
Most clients can’t read a floor plan, but they understand a well-edited video. A walkthrough lets them see the flow, feel the space, and picture the finishes before a single wall is built. That’s why the way you edit matters just as much as the design itself.
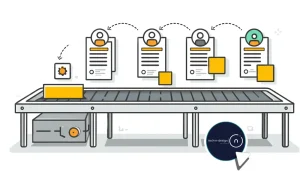
If you’re still picking the right tool, here’s a list of video editing software I recommend. I use these same techniques no matter what platform I’m on.
What Editing Moves Make a Walkthrough Clear?
Before I even open Premiere Pro or Final Cut, I know exactly how I want a walkthrough to feel for the client. The goal is to help them understand space, flow, and finishes without getting lost. Here’s the 5-step editing framework I use for interior design presentations.
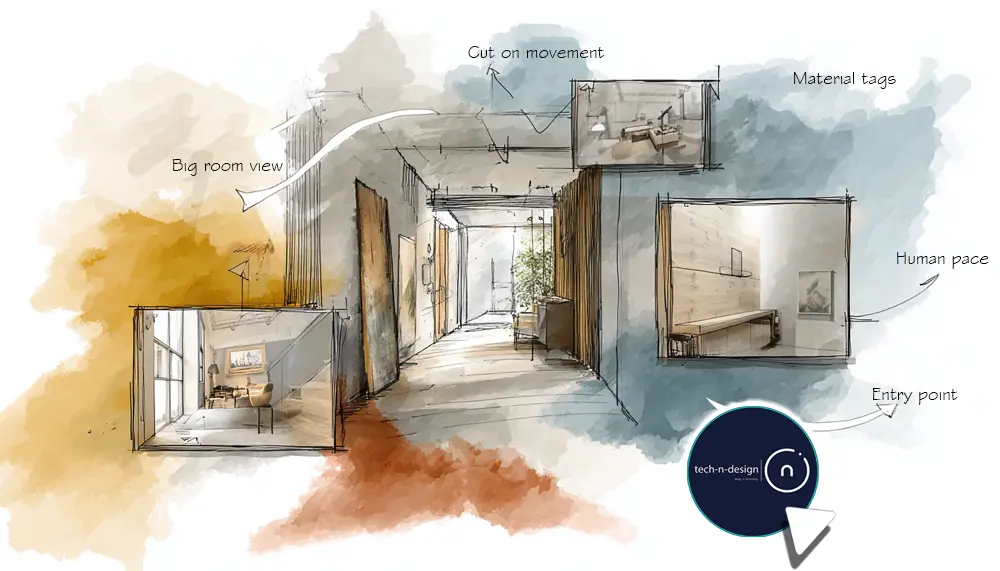
1. Show the Entry First
The first frame matters. I always start where the client would walk in during real life. That opening shot sets their mental map, gives them a point of reference, and makes every cut that follows easier to follow. Without it, people struggle to piece the layout together.
2. Keep the Pacing Human
An interior walkthrough should move like a person, not a drone on fast-forward. I match the edit speed to a natural walking pace, slowing slightly when there’s a feature worth noticing. If the camera drifts too slowly, they lose focus; too fast, and they miss key details. The right pacing keeps them present in the space.
3. Use Overlays for Finish Tags
A well-timed overlay can replace a paragraph of explanation. One clean line for each material or finish, “Oak herringbone flooring” or “Matte black fixtures”, is enough. It saves you from over-talking in the video and helps clients connect what they see with what’s in the spec sheet.
4. Cut on Movement
I never cut on a still frame. I wait for a door to open, a turn in the hallway, or a shift in view before transitioning. This keeps the flow seamless and makes it feel like one continuous walk rather than a stitched-together tour. Clients may not notice the technique, but they feel the difference.
5. Finish with the Big View
The last frame is your anchor. I always close with a wide shot or slow pan of the entire space so clients can lock it in visually. This is the image they’ll remember when making decisions, and often the one they’ll share with other stakeholders.
How Do You Keep a Walkthrough Grounded in Reality?
A walkthrough should feel real, not like a concept that will change later. I stick to a few rules to keep it honest:
- Match lighting to the actual orientation. If a room faces south, the video should show warm, direct daylight. If it’s north-facing, keep it cooler and softer.
- Only show approved materials. If the flooring or paint isn’t confirmed, leave it out. Guessing creates confusion later.
- Skip placeholder furniture. Unless it’s already in the spec, it’s better to show an empty space than the wrong piece.
- End with a still plan or elevation. This gives clients a clear reference after the video ends and ties the visuals back to the layout.
Conclusion
Editing is your chance to walk clients through a design before it’s built. Focus on orientation, pacing, visual tags, and closing with a strong view. That’s what turns a simple video into a persuasive presentation.
Interior walkthroughs improve how clients understand layouts, light flow, materials, and space. See more insights from Cylind.
FAQs
How long should a design walkthrough video be?
Keep it between 2–4 minutes. Long enough to show flow and finishes, short enough to hold attention.
What’s the best way to start a walkthrough?
Begin at the entry point clients will actually use. It orients them and makes the rest of the tour feel natural.
How can I make sure clients notice materials in the video?
Add clean, one-line overlays with the material name. Keep them brief so they support the visuals instead of distracting.
Should I include virtual furniture in a walkthrough?
Only if it’s part of the approved design. Unconfirmed furniture can set wrong expectations.
How do I make video pacing feel realistic?
Match movement speed to how someone would naturally walk through the space. Test it by watching and asking, “Does this feel like I’m there?”